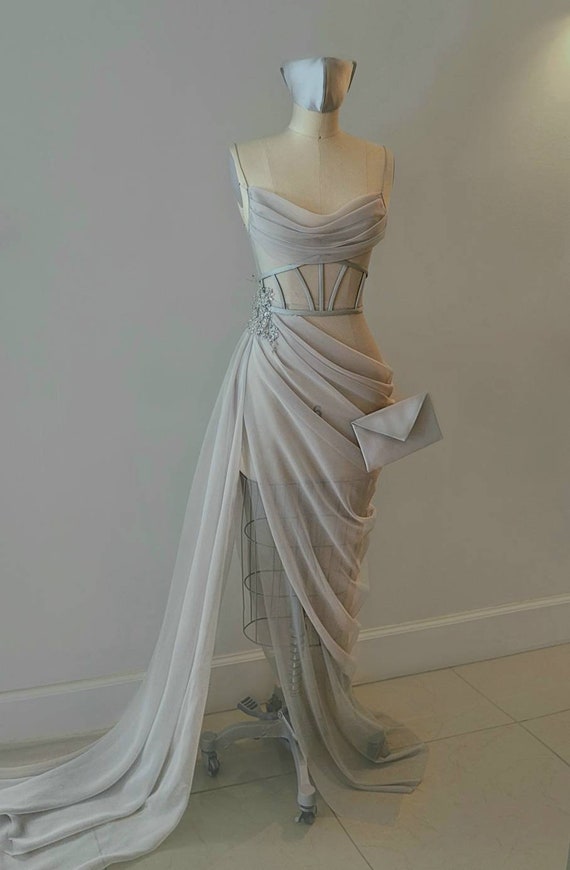
### Materials Needed:
- Chiffon fabric (4-6 yards depending on length and width of the fabric)
- Lining fabric (optional, but recommended for opacity)
- Sewing machine
- Thread matching the fabric
- Fabric scissors
- Pins
- Measuring tape
- Dress pattern (optional, for guidance)
- Tailor's chalk or fabric marker
### Preparation:
1. **Choose a Pattern**: Select a dress pattern that suits your style. Patterns with draping or flowy elements work well with chiffon. You can find patterns online or at a fabric store.
2. **Measure and Cut**: Measure yourself (bust, waist, hips, and desired dress length) and adjust the pattern accordingly. Use these measurements to cut your chiffon and lining. Remember to add seam allowances.
3. **Cutting Chiffon**: Lay the chiffon flat on a cutting surface. Use weights or pins to hold the pattern in place and carefully cut the fabric. Cutting chiffon can be tricky, so take your time to ensure clean cuts.
### Steps to Sew the Dress:
#### Step 1: Prepare the Lining
- If using a lining, sew the lining first. This will serve as a practice run for sewing the actual chiffon and will help stabilize the more delicate outer fabric.
#### Step 2: Sew the Darts
- If your pattern has darts, sew them both on the lining and the chiffon. This helps to shape the dress.
#### Step 3: Sew the Seams
- Start by sewing the side seams of the chiffon and then the lining. Pin the fabric carefully before sewing to avoid slipping.
#### Step 4: Attach the Chiffon to the Lining
- With right sides together, sew the chiffon to the lining along the neckline and armholes. Turn right side out and press gently with a low heat iron.
#### Step 5: Create the Drapes
- Draping can be done by manipulating the fabric on a dress form or by following the pattern’s instructions for draping. Pin the drapes in place and tack them by hand to secure.
#### Step 6: Finish the Edges
- Hem the bottom of the dress. Chiffon can fray easily, so consider a rolled hem or a narrow hem for a clean finish.
#### Step 7: Final Touches
- Add any additional embellishments like belts, ribbons, or decorative stitches. Press the dress gently, taking care not to melt or distort the fabric.
### Additional Tips:
- Always test your stitches on a scrap of fabric to ensure the tension and length are suitable for chiffon.
- Consider using a French seam for a clean finish that encloses the raw edges.
- Handle the fabric gently both while sewing and wearing, as chiffon can tear or snag easily.
Once you finish, you’ll have a beautiful, custom-made draped chiffon dress that’s perfect for special occasions. Enjoy the process and the final product of your creative endeavor!

287 × 320
Source:https://www.instructables.com/Easy-Draped-Maxi-Dress-DIY-Tutorial/

720 × 1280
Source:https://m.youtube.com/watch?v\u003dUm8PanVhg0w

2000 × 2000
Source:https://www.fiskars.com/en-us/crafting-and-sewing/ideas-and-how-tos/sewing/diy-chiffon-maxi-dress

870 × 570
Source:https://www.etsy.com/listing/1010083515/pre-order-handmade-draped-gray-silver

599 × 230
Source:https://www.cutoutandkeep.net/projects/easy-draped-maxi-dress-diy-tutorial

600 × 143
Source:https://www.instructables.com/Easy-Draped-Maxi-Dress-DIY-Tutorial/

720 × 1280
Source:https://m.youtube.com/watch?v\u003d2L4siVE5-VM

489 × 504
Source:http://sewpetitegal.blogspot.com/2014/07/draped-neck-maxi-dress-diy-tutorial.html

720 × 1280
Source:https://www.youtube.com/watch?v\u003dUFL-GhGEl3A

2048 × 1365
Source:https://creativefashionblog.com/how-to-make-your-own-maxi-dress/
